

A couple of weeks ago, I posted a tutorial on how I take and edit my photos, and you guys seemed to enjoy it.
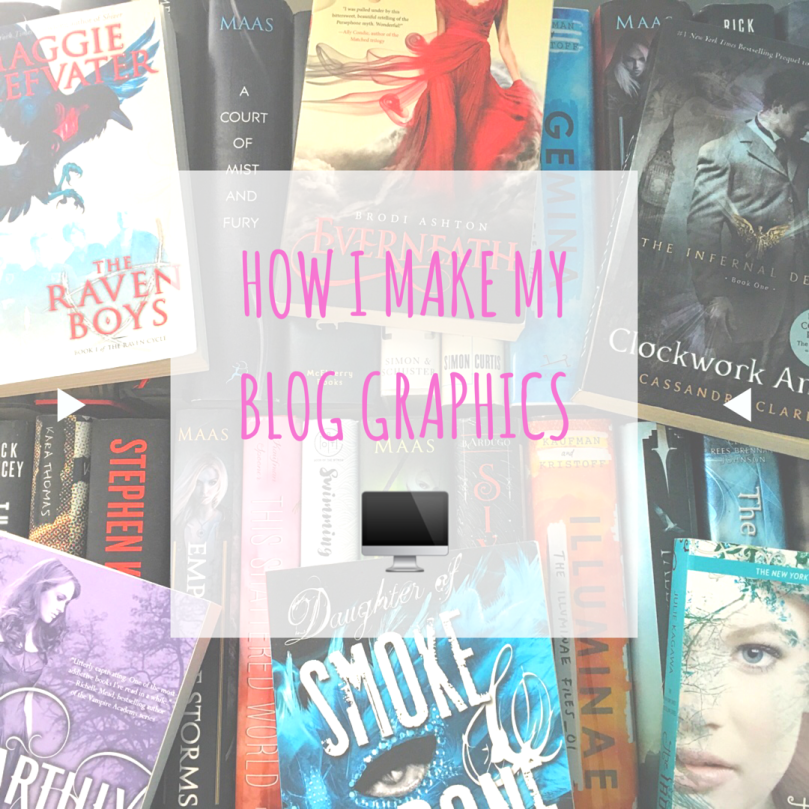
So, now I’m finally going to be posting my tutorial on how I make my blog graphics, mainly the ones I use for my Featured Images! This was second place when I asked my followers on Books Amino what they wanted to see, so therefore, it came second.

Personally, the app I use to make my graphics is Canva. It’s free, it has templates that I can work off of, and it’s quite easy to use, so I highly recommend it!
For the most part, I use my own photos as the background for my graphics, but if you’re not into that, I think Freepik is the best way to go! It’s an amazing website where as long as you credit who made what you use, you can use anything, and it has LOADS of pretty designs, so don’t be scared to use it!
")
")
After opening the Canva app, there is a long list of templates that you can scroll through along the top of the app. Personally, I click the “Instagram” button, and pull the screen down so the “Search Instagram Templates” pops up. I usually just type “Where” and it takes me to the template that I usually use!
You might be wondering why I use “Instagram,” and not the official “Blog Graphic,” but there are a couple of reasons why. One, because I’ve attempted to use “Blog Graphic” templates and they are much harder to manipulate to your liking. Also, because I much prefer squares over rectangles as my Featured Images, but this is all personal opinion. Feel free to use “Blog Graphic,” if you’d like!
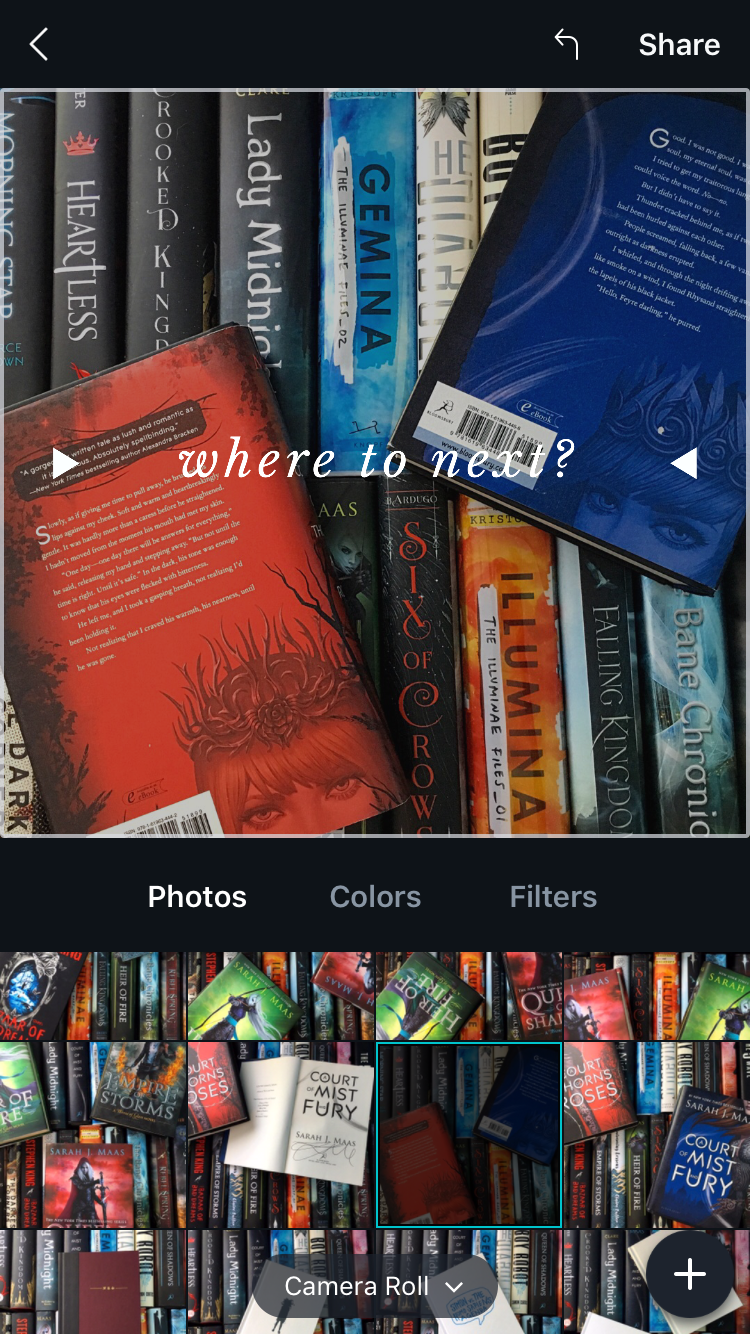
After selecting the template, I’m taken to this. I click on the template, then scroll through my Camera Roll for the picture I’d like to choose as my background, then select it, which changes the background!
Now, I can edit my background photo. I usually skip over the “Colors” section and just use “Filters.” As you can see, there are unlimited choices for what filter you can use on your photo, but I personally choose “Wry,” because I like my graphics to be softer than my pictures (which are usually super bright). But it’s all up to you and what you prefer! After that, I double click the text on the screen and delete it.
")
")
After that, I click away from there, I’m taken to a screen that says “Tap something to start editing.” Click the “+” in the corner that’s surrounded by a circle, then click “Library,” and you’re free to choose a shape! Again, there are unlimited choices for which shapes you can use and different designs to implement, but I personally prefer to use the square.
")
")
After choosing the square, I double-tap it, which gives you the choice of editing the shape. You can change the color of it if you want, but the only thing I do is play around with the transparency of the shape. For me, the setting I like best is at “75.”
")
")
After editing the square, I go back to the home screen, click the “+” again, but this time click the = “Text.” There are loads of pre-formatted font designs and such that you can click on and edit the text, but I usually just like to click the “+Add some text of your own” bar. After I do that, I just type in the title of my blog post and click “Enter.” You’re then taken to a set-up where you can change your font. Obviously, there are lots of things you can do to change the font, but I only play around with four things: the color, the “B,” the “AA,” and the font.

")
Regarding color, tap on the black square next to the number 42. There are default colors, but I use pink, so I just click the square with a “+” in it under “Used.” I then scroll to the area on the bar that shows me pink, and then just guess by sight which pink to use. Since the update, coloring is ten times harder since it doesn’t even bother to save the color you use (which I hate with a fiery passion), so I work with what I got.
")
")
I then click the “B” and “AA” to bold the font a little, and then click the font and scroll through until I get to “Amatic Small Caps,” which is what I use, but there are endless font choices! After that, click on the number to scroll through and make my font bigger or smaller, then click the “Share” button in the top right hand corner to save it to my images.
")
")
And, behold, this is the final product:
And, basically, that’s how I make my blog graphics!
I’m hoping that helped you guys out a lot! Much like I said in my first two tutorials, if there’s anything specific you want me to make a tutorial on, feel free to leave your ideas in the comments; I’d love to hear them!


Such a great post! How nice of you to share that. I like Canva too. It’s easy to use! 🙂
LikeLiked by 1 person
Thank you so much! And, yes, Canva is easy to use, which is very convenient for me since I’m not out of this world good at graphics making. 😂
LikeLiked by 1 person
I use Canava too so I totally relate to this process!
LikeLiked by 1 person
Yes, they updated and I literally had to write the post all over again because t was totally different than when I first wrote it. 🙃 The color thing annoys me so much, but I’ll survive, I guess.
LikeLiked by 1 person
Canva will totally email you to ask to link back to their website when they see this 😂 I mentioned Canca in a post once and got an email asking me to link because I hadn’t done already haha
LikeLiked by 1 person
Will they??? 😂 I should go ahead and do it then! How did they even find you!
LikeLiked by 1 person
Yeah haha! I have no idea, it just appeared in my inbox a couple of days after I posted about them! Strange 😁
LikeLiked by 1 person
I’ve never heard about that app before! I’ve tried with that graphic style but I’ve always found it better on other blogs than mine, so I left it😂
LikeLiked by 1 person
Yeah, it took me a month before I found out about it! Apparently, it’s also a website (which I didn’t know about until like last month). 😂 Ooh, there are so many graphic styles I want to try out, but my attempts were terrible, so I quit. 😝
LikeLiked by 1 person
Haha same! I’m quite obsessed with the looks of my blog because I feel like that’s one of the first things that catch my attention when I disciver a new blog, but some of them work horrible on mine 😂
LikeLiked by 1 person
So glad you shared this!! ❤️
LikeLiked by 1 person
Yeah, I hope it helped! 😄
LikeLiked by 1 person
This was a very helpful post! Thanks for sharing. I’ve always admired your graphics btw.
LikeLiked by 1 person
I’m so glad it was! And thank you so much! I’ve come very far; my first few graphics were so bad oh my God. 😂
LikeLike
Thank you for sharing.
LikeLiked by 1 person
No problem! 😄
LikeLiked by 1 person
I’ve never used Canva before but it looks like a really helpful app! This was really cool to see your process, can’t wait for your next tutorial! 😍
LikeLiked by 1 person
It is! Yeah, I’m thinking of doing a tutorial in August about how I write my posts so quickly since so many people think I have some sort of magic. 😂
LikeLiked by 1 person
I love Canva, I use it for almost anything I do in school. Lovely post!
LikeLiked by 1 person
Thank you so much! Oh, at my school, we used Pic Collage a lot in my Spanish class, so I get you on that all thing. 😂
LikeLiked by 1 person
Second person to recommend Canva this week! I’m coming up on a follower benchmark, so I’ll probably test it out for that. 🙂
LikeLiked by 1 person
Ooh, yeah! I didn’t discover Canva for a long time, which was tragic, so I’m glad you found it faster than I did! 😄
LikeLiked by 1 person
I use canva for my blog graphics too, so easy, I just wish you could import fonts into it without paying but they have to make their money somehow I guess
LikeLiked by 1 person
It is really easy! Ooh, I’ve never really wondered about fonts. I’m 99% sure I use the same fonts I did when I started Canva. 😂
LikeLike
I use Canva for most of my blog graphics too. It’s just so simple to use and has so many different options! I was wondering, regarding FreePik, would it be okay to just credit the creator of the image in my blog disclaimer, or would I have to mention it in every post where an image is used?
LikeLiked by 1 person
Yes, that’s so true! I tried a lot of online programs before I discovered Canva, and Canva was definitely the easiest. Personally, I only credited my arrows (which came from Freepik) once because I think it says you can do that in Freepik’s rules if you’re going to use it multiple times! 😄
LikeLiked by 1 person
Ah okay, thank you!
LikeLiked by 2 people
First of all, you blog graphics are GORGEOUS😍 I’ve heard of canva but I’ve never actually used it myself, we use pic monkey instead which is probably a lot less convenient😂 but very clever and beautiful graphics! I’ll definitely have to check it out.
💖Ivy
LikeLiked by 1 person
Thank you so much! Ooh, I use Pic Monkey to edit my photos; I’ve never attempted to use it to make graphics though! I imagine it’d be difficult! 😂
LikeLiked by 1 person
Aww you’re welcome! Picmonkey is actually pretty good, just less convenient but it took me a while to figure it out tbh 😂
LikeLiked by 1 person
I’ve always LOVED your graphics and thought they were really professional looking! I was wondering earlier today how or what I would use to learn how to make them so thank you soooooo much you are a lifesaver right now!!
LikeLiked by 1 person
Aw, thank you so much! I’m definitely not any sort of professional; there are much better people at graphics than I am! 😂 I’m so glad I could help you! 😄
LikeLiked by 1 person
Dude that’s super easy! Thank you SO MUCH for letting us in on this. 😀
LikeLiked by 1 person
It is easy! And I’m glad I could help you! 😄
LikeLike
I am SO impressed that you make all your graphics on your phone! Well I guess it’s easier because it’s in an app haha. But still!
I use PicMonkey for all my graphics. Canva is cool, with all the templates and stuff, but for SOME ODD REASON I’m just irritated by it? I have no idea what I’m irritated BY, though. Sometimes PicMonkey is slow BUT you can use your own fonts which is very important to me. XD
And I’ve never noticed those little triangles on the right and left? Oops. 😛
LikeLiked by 1 person
Yeah, I make all my graphics on my phone! I tried doing it on the computer once, but the quality sucked and was really blurry for some reason. So I just do it on my phone and upload it to Google Drive!
You’re the second person to say that! 😄 I only use PicMonkey to edit my photos and have never attempted to use it for graphics.
lol I was about to say “What triangles?” and then I realized you were talking about my graphics! 😂 You can see them more clearly without a filter, but the filter I use whites things out!
LikeLiked by 1 person
Nice tutorial. Never heard of Canva but it looks user friendly.
LikeLiked by 1 person
Thank you! And, yeah, Canva is very easy to use; I love it! ❤
LikeLike
I use Canva as well! However, I do have a question about using Freepik. You mentioned that as long as the image is credited, then it can be used. How would I give credit to the original owner/creator of the image?
LikeLiked by 1 person
For me, since I used a background and arrow multiple times in all of my posts, I just credited them once when I was talking about how I made them! Freepik has more detailed rules for how you should do things if you want to double check or need better advice! 😄
LikeLike
Got it. Thanks!
Also, one more question: How do I download the images from Freepik? (Clearly technology and I are not the best of friends yet… 😅)
LikeLiked by 1 person
I make most of my graphics on my phone, so the downloading process is different for me! I have an app called Zip Tool that unzips files like Freepik’s once I download them and then save them in my Photos before working on them in Canva. If you want to learn how to do it on a computer, this tutorial is probably more helpful: https://readatmidnight.com/2016/04/25/blog-graphics-tutorial-for-the-thrifty-canva-freepik/
LikeLiked by 1 person
Ah, okay. Thank you!
LikeLiked by 1 person